Category Archives: Shooting

Becoming Aware of Awareness

AwarenessThe discouraging thing about writing an article like this is that those who really need it aren’t aware they need it. If you know someone that does and I’m sure you do, maybe you could pass this along.

In our CHL (soon to be called LTC) classes, we touch on Awareness. We go into it a little more in the Advanced Concealed Carry and Refuse to be a Victim classes. I think it needs to be taught as a way of life beginning in at least Middle School. It’s not a “gun” thing. And it’s about more than personal safety, though that’s a big part of it. Some of it is about a rapidly dwindling character trait in today’s society — common courtesy.

Practically every day of my life I take actions to accommodate people who just aren’t paying attention. I’m sure you do, too. Before getting into the safety aspect of awareness I’m going to list a few of these failure to pay attention actions that are just plain courtesy. If you’re doing this stuff, STOP IT!

  1. In a drive-thru, it can be a bank teller, an ATM or fast food, it doesn’t matter. I’m number two at the window. Number one took a while to place their order, but that’s okay, Everybody wants their food right. It’s just that some people decide what they’re going to order before getting in the drive-thru. But we’re past that point now. Whatever it is, food, money, now it has been delivered, and it’s my turn! Me, back here in the car behind you, waiting patiently. I expect car number one to drive off, or at least to pull up so I can get my business done. But, no. It appears the driver of car number one had unfastened their seat belt and is now searching for it to re-buckle. Now, they are rearranging whatever is on the front seat. It looks like they are putting some stuff away in the glove compartment. Ready to move? Oops, not yet. Are you kidding me?  Did she just pull the visor down and used the mirror to check her lipstick. That done, I’m sure it’s my turn at the drive-thru. But not yet!  Something is wrong with how the wallet went back into the purse. That has to be fixed. Oh, and the mirrors need to be readjusted. Surely when doing that, she noticed that someone is behind her! Finally after what seems like 5 minutes, the car ahead of me drives off. During this whole time he/she never thought about the car behind them and how easy it would be to pull up a little, maybe even into a parking place and take care of all the adjustments so the next car in line can take care of business.
  2. I am on the street at a traffic light with a right turn lane angling off and right turn on red allowed. I want to turn right. But the car in front of me is 10 feet back from the one ahead of it. If the driver would pull up just 2 or 3 of those 10 feet, I can make my turn and be on the way. But, they’re even aware that I’m back here. This is not just a right turn issue. It could involve trying to merge into a lane of traffic from another while at a standstill, or any number of places where if a driver would simply look around them they would see the need to help someone else out a little simply by pulling up a few feet.
  3. Now that we’re on the street, let’s talk about traffic lights. You drive the same route every day. Would it be too hard to learn the sequence of the lights so that when your turn to go is coming up, you can put your phone down (yes, put it down!) and get ready for the change, instead of waiting for the car or cars behind you to honk to let you know that the light has changed. Oh, and because they are nice people, they actually waited a bit to see if you would notice, but since you didn’t, you made it through at the tail end of the yellow light, but they didn’t. Another full cycle they have to wait because you weren’t paying attention.

You get my drift, these are mostly about courtesy, though that thing about the phone and driving is a whole lot more. If you continue to text and drive, I’m going to consider it Assault with a Deadly Weapon when you venture over into my lane and take steps to defend myself!

Situational Awareness

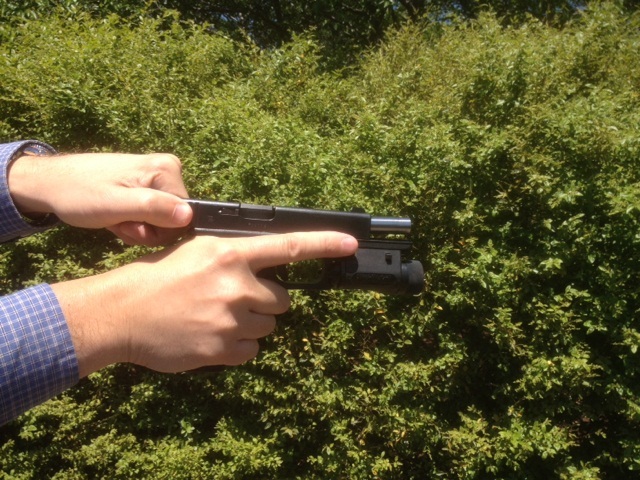
We teach Awareness in our classes for your safety. We start by telling you to be aware of your surroundings and to be aware of the people around you. There’s a lot more to this than I can cover in this one article, but allow me to share some basics that might help keep you alive:

  1. Keep your chin up and head on a swivel no matter where you are. Staring at that little screen in your hand all the time is dangerous. You don’t know who around you may be wanting you or what you have and can get really close without you realizing it. Or when you might be about to walk into the path of an oncoming bus or into a pool of water.
  2. When you enter a room, make note of the exits and places to hide in case that room becomes the type of madhouse that could result from a crazy person or persons on the rampage, whether with a gun or not. If you’re not familiar with the old concept of how a gunfighter never sits with his back to the saloon door, I suggest you adapt something similar. Sit where you have your back close to a wall, if possible, and where you can see the bulk of the room and especially the entrances. That way you can’t be caught totally of guard by a dangerous situation.
  3. Walking or jogging, please always do this on the side of the street facing traffic. Personally, I’d prefer seeing you pick a jogging path or sidewalk or at least some lightly traveled streets. But you know what I see far too often?  A walker or jogger with their back to me when I approach in my car, which means they are moving with traffic rather than against it, with headphones on, listening to music, so they can’t even hear the cars approach from behind them, often wearing dark colored clothing and doing this in the dim light of evening or early morning.  This is STUPID! I don’t know how these people missed the safety classes taught in Boy Scouts, Girl Scouts, schools, or, wait, maybe they don’t teach this stuff anymore. Okay what about some common sense. I got into an argument about this one time with a relative, who was so mixed up. She thought she was supposed to follow the same rules that the cars do. That’s not the case, please, be careful out there.
  4. Here’s something else I see that just amazes me. A driver is sitting number one at a traffic light. The light changes so that they have a green light. Without looking left, without look right, they start right off into the intersection. OMG!  People run red lights! They run red lights! Look in both directions before moving into an intersection, please!
  5. My father taught me a lot of things about driving that aren’t taught anymore. I took driver’s education after I got my license because it resulted in my parents having a lower insurance rate. The Driver’s Education instructor echoed what my dad taught me. One was the thing I mentioned earlier about understanding the traffic light signals so you’re ready to go when they change. Another thing was when you’re turning off a main road into a side road or parking lot, you do not need to, and should not, slow down to a crawl before exiting the main road. That causes people behind you to have to slam on their brakes, which results in a domino effect down the line. Keep your speed up, make your turn and after you’re off the main road, then readjust your hands on the steering wheel or whatever you need to do to proceed on in the new direction. Try it. I promise you can do this.

I think I’ll quit. With these few items I’ve mentioned you can get started onto a life of Awareness and even Situational Awareness. Please do.

Summertime Carry – What?!!

I am honestly bewildered by the plethora of articles about concealed carry in the summertime and how you if you want to carry when the weather is hot you have to get one of those little mouse guns or pocket guns. Yeah, yeah, yeah, the first rule of a gunfight is to have a gun. Right. To me that sounds like the first rule of winning a boxing match is getting in the ring. But a 100 pound woman with no training getting into the ring with a heavyweight champion boxer is not going to win. Likewise, an untrained, civilian with a pocket .380 is not going to win in an altercation with a hardened criminal on drugs armed with a .45 caliber handgun.

Honestly, folks, it’s not hard to carry a decent size and caliber handgun, no matter the season. Wear shorts. Just wear shorts with belt loops. Wear a short-sleeve, lightweight shirt. But get shirts with a pattern to them, preferably in colors other than white. If you’ll do that and follow the suggestions I’ve made in earlier blogs and which I’ll repeat here, you can be well-armed regardless of the season. A gun at your belt does not care how long the pants legs are. A gun covered by a shirt tail does not care how long the sleeves are.

Yesterday I watched a family go into a restaurant. Dad, mom and boy of about 12. Dad was armed. How do I know? Well, I don’t know for sure, but he was wearing cargo shorts with a big bulge in one of his thigh pockets. “He’s got a gun in that pocket,” I thought when I watched them walk. He even looked like a gun guy. My next thought was, “where is he going to find a bad guy who will wait for him to unzip that pocket and pull his little gun out, orient it and get it pointed in the right direction?” My very next thought was that the clothing he was wearing would have been just as conducive to carrying a .45 Springfield Operator 1911 as the clothes I was wearing. His shirt was white, but it was a tactical-type shirt, with a long shirttail worn outside his pants. His shorts were khaki, 5.11-style shorts. Those shorts have belt loops. His combination of clothing would carry and conceal in the same way mine does.

IWB Holster

The image on the right is a cutaway showing where the gun is in the image to the left. Notice this is not a big guy.

THE SEASON DOES NOT MATTER WHEN IT COMES TO DEFENDING YOURSELF AND YOUR LOVED ONES. Once again, here’s how a guy can carry a big gun. A guy that weighs 130 pounds or a guy that weighs 300 pounds. This method works for both.

  1. Buy a good gun belt.  It can be a 1 1/4 to 1 3/4 inch wide, two layers thick, leather gun belt or a 5.11 Tactical Sierra Bravo Duty belt. It just needs to have enough thickness to support the clips from the holster and to support the weight of the firearm.
  2. Get a good IWB holster, custom made for your gun. I’ve used Crossbreed SuperTuck, WhiteHat Holsters, D.M. Bullard Leather, Alien Gear, Galco KingTuk, and MTR Custom Leather holsters. They all work well.
  3. Find the best position on your body for comfort and accessibility. Most of the holster manufacturers recommend the 4:00 position. For me 3:00 works best for semi-automatics and for some reason 11:00 in a cross draw position for revolvers. That’s commonly called appendix carry.
  4. Unload your gun and practice drawing until you can do it smoothly over and over. Don’t worry about speed, worry about smoothness. The speed will come with practice. Break  your practice down into steps:  a) uncover, b) grip, c) draw, d) rotate, e) join hands and extend.  Do this over and over until it becomes muscle memory.

Now, you may actually have a chance should you encounter an unpleasant situation where someone wants what you have and is willing to kill you for it, regardless of the season or length and weight of your cover clothing.

Rock Island Ultra MS 1911 – The Price is So Right and So is the Gun

Rock Island CommanderSome of my buddies have owned Rock Island 1911s and I’ve seen some pretty impressive targets as a result of their shooting range adventures. Recently I saw one of the Rock Ultra series Commanders at an “I don’t see how they can do that!” price. If you’ve read any of my stuff previously, you know Commander-size 1911 pistols are among my favorites. My “I don’t need any more guns” resolve seems to be short-lived, so naturally I gave in. The gun is classified as a Rock Ultra MS and it came with the features I like such as a skeletonized hammer and trigger and ambi-safety. It has what appears to be a very durable Parkerized finish. The sights are not my favorite, I like night sights, but the ones on this gun are visible and snag-free. The factory picture shows it with a fiber optic sight on the front, but mine doesn’t have that. The sights are black all over.

I changed the grips when I got it home. The gun came with a set of very aggressive G-10 grips. I had some not-so aggressive ones on hand, so I did a switcheroo with the grips, wiped off the shipping oil and put the gun and a box of 45 hollow points in the Jeep so I could try it out during the next trip to the range. That trip turned out to be a CHL class and since we had several instructors on hand, I set up on one of the lanes with a B-27 target, the Rock Island Commander and a box of 45s, planning to shoot part, if not all of the Texas CHL Shooting Proficiency test.

RITarget1

Target After the 1st 10 Rounds

After ten rounds I was disappointed. This is not how I shoot. I was confident that every time I squeezed the trigger my front sight was on the X and was properly aligned with the back sight, but my shots were going wide. You’ve seen my 1911 Commander targets. I generally obliterate the center of the target, especially at close range. The distance here was only 9-feet!

I shot another ten rounds and then we moved the targets out to 21 feet. By the time I’d fired 30 rounds total, I figured I was done. I pulled the target back in, and left some ammo so the other two instructors could try their hands at the gun. When the target got close to me I was surprised. The last 15 rounds or so, even at 21 feet were right in the center of the target, where they should be. That was more like it! When the other two instructors shot the gun, their shots were grouping well, but they both said their shots were impacting a little below their point of aim.

As we were discussing our thoughts about the gun later, one of them mentioned he had read that Rock Islands tend to get better after a little break-in. Funny, I read in the manual where they recommended a 500 round break-in period before making any kind of warranty claim. I’ve never been much on these break-in period claims. Most of my guns have cycled and fired right out of the box just like I wanted them to. But in this case, this particular gun’s accuracy did improve after a few rounds had been put through it.

Bull Barrel vs. Barrel BushingThere was another reason besides the price that I wanted to try this gun. It has a bull barrel as opposed to the  barrel bushing arrangement on every other 1911 I’ve owned or shot. I’ve handled other 1911 style guns with bull barrels and noted they’re a little more challenging to take apart for cleaning, but had no information about whether one was better than the other. Comments I’ve read say that it adds a little more weight up front, which might help with recoil and it results in less parts to wear out. Another reason I’ve read is that in some of the early short-barrel 1911s the bushings had to be thinner and tended to break. I think that was a Colt issue with some of the earlier Commander or Officer firearms. Once the accuracy of this particular firearm improved to the point it became a non-issue I can’t tell the difference between shooting it and shooting a standard 1911 with the barrel bushing.

Workmanship on the Rock Island is superb. I find nothing to indicate its lower cost results in lower quality. From what I’ve read about Armscor, the maker of the Rock Island guns, they have state-of-the-art CNC machinery and they make the guns from the same 4140 steel as the best made guns from American manufacturers. I originally thought I might try this gun, write about it, then sell it, but for now I’ve decided to hold onto it. I’ll probably make it my “truck” gun, only now I drive a Jeep, so I guess it will be my “Jeep” gun.

Would I recommend it to others? If price is an issue and that stands between you getting a good 1911 45 versus some other gun, I would certainly suggest it with no reservations. Currently, I believe the Ruger Lightweight Commander 1911 is the best 1911 value on the market, with the Remington R1 Carry close behind. If you’re willing and able to spend more money there are a number of options. But this Rock Island is nothing you would be ashamed to own, carry, even show off!

Update 11/13/2020:

For more on my experience with Rock Island pistols, see my review of the Rock Island MAPP MS in the Mar/Apr 2019 issue of American Handgunner and a review of the Rock Island XTM-22 1911 in 22 Magnum in the December 2019 issue of GUNS Magazine.

Slide Lock or Slide Stop?

Sling Shot Method of Slide Release

Racking the Slide Using the Sling-Shot Method

Early in my training to become a handgun instructor, I was taught to place a semi-automatic handgun into battery by pinching the rear end of the slide between the thumb and forefinger of my support hand, pulling back on the slide with the support hand while pushing forward on the grip with my shooting hand, then releasing the slide when I felt it stop, which happens in something like an eighth of an inch on most semi-automatics. For a slide that is difficult to pull back, an alternative to pinching the slide with between the thumb and forefinger is to reach across the rear of the slide with the heal of my hand on the left side of the slide and my fingers on the right side (I’m right-handed), squeeze tight and pull the slide back and release it that way. Either of these methods is commonly called the “sling-shot” method by most instructors. To me the terms “sling-shot” and “rack” the slide are synonymous in this context.

The reason most commonly given for doing it this is that it is easier on the gun and won’t wear the slide-lock notch out like just thumbing the slide lock does over time. Since my initial instruction in this regard, I’ve heard it from instructors and gunsmith’s alike and have adopted it as the method I teach. When I see old-time shooters releasing the slide lock with their thumb, I usually at least make them aware of the alternate method while saying something like “I know the military teaches using your thumb to disengage the slide lock, but they have armorers who can fix their pistols when the slide lock notch wears out.”

In studying the issue more carefully, I’ve discovered some other reasons for using the sling-shot method as opposed to thumbing the slide lock. One of these is that this method provides the gun with a stronger, cleaner push into battery, as long as you don’t ride the slide forward with your hand. That’s the important part. Whether you pinch the slide or reach across it with your hand to grasp it, you must let it go as soon as you feel the slide stop in its rearward move. This will happen with very little rearward movement. When you let it go, let it go like it was hot and burning your hands. If you need to reach across the slide to grasp it, avoid the ejection port as this is a place on the gun that can easily pinch you, perhaps even drawing blood.

Thumbing the Slide Lock

Using the Thumb to Release the Slide Lock

The sling-shot method works on all semi-automatics, pretty much the same. Slide lock levers are all over the place from gun to gun. Some are small, some are large, some are way forward, some are near the rear of the slide, maybe not the notch, but the lever (I’m thinking in particular here of the Sig Sauer SigPro 2022). Maybe you’re left-handed and the slide lock lever is on the side opposite your shooting hand thumb. If you use the sling-shot method, you don’t have to worry about where the slide lock is and if you can get your thumb on it.

Strength is sometimes an issue when racking a slide, especially for women or anybody with hand issues such as arthritis or any of the issues that come with long-term and frequent computer use. Using your thumb to release a slide lock can have the same issues. Regardless, I won’t do it with my guns because I want them to last a long time, plus I find it much quicker to just sling-shot the slide.

When it comes to racking slides and locking them back for the range safety officers or to load the gun, new gun owners are often confused with the internal slide lock associated with an empty magazine. Practically all semi-automatics are designed such that when a magazine is emptied the follower inside the magazine engages a notch inside the gun that locks the slide back. This is how you know the gun is empty and requires reloading before you can continue shooting. This internal slide lock can frustrate your attempts to sling-shot the slide, because with an empty magazine in the gun, you must also be pushing the slide lock down at the same time you’re racking the slide. This should be done with the thumb of your shooting hand if you’re holding the gun correctly.  Just remember, if the gun has no magazine in it or a magazine with ammunition in it, simply pull the slide back slightly and release it to get the slide to go forward with the proper strength and velocity for it to go into battery. But with an empty magazine, you must also push the slide lock down while rack the slide.

It’s Not Bragging if You Have the Pictures!

Sig Sauer Emperor Scorpion CommanderWe had finished the range portion of the NRA Basic Pistol class Phil Epps and I had taught Sunday and had the range for a few more minutes. This gave me the opportunity to do a little follow up testing regarding my Sig Sauer 1911 Scorpion Commander. On a recent trip to test various magazine/ammunition combinations I had discovered that Fiocchi jacked hollow point rounds did not feed reliably in that particular gun. Since every other type of ammunition I had tried worked fine, I was puzzled. When I got the gun home and began looking for the source of the problem, I didn’t find one. In fact, when cycling the gun by hand, it fed those rounds with no problem. So, now back at the range, I ran a target out to ten feet or so, loaded eight Fiocchi hollow points in one of my Colt magazines and left whatever was already in the chamber there. Why was one in the chamber? It was my carry gun for the day.

Sig Sauer TargetI started shooting with my typical two-hand grip, unsupported and after 4 shots there had been no issues with feeding the rounds. But there was something else. The target had a single quarter-sized hole in which all four rounds had converged. I called Phil over and got him to take a picture with his IPhone. After getting that benchmark, he snapped a photo after each of the remaining shots in the magazine. After all nine rounds, it was a pretty impressive target.

Sig Target AFter 9 rounds

I went on to shoot some more and a couple of our students who had hung around to watch were given the opportunity to shoot the gun as well. The final target had a big fist-sized hole in the center with a couple of flyers in the inner orange ring.

I could be just bragging on me a little, but what I’m really bragging on is the gun! My 67 year-old arthritic hands aren’t always able to hold a handgun absolutely steady, but I was having a pretty good day that day. The gun was having an amazing day. But, I’ve noticed that about Sig Sauer pistols, at least the ones I own. They always make me look good!

UPDATE 10/3/2015

I had a chance to shoot the Sig again today as we were wrapping up a CHL class. I had approximately 20 rounds of mix and match ammo. It included some Sig Sauer JHP, Speer Gold Dot JHP and Hornady Zombie ammo, which is basically their Critical Defense. I fired 20 rounds during the timed portions of the CHL class, 1 round every 2 seconds and 2 rounds every 3 seconds. The target was at the 9 foot range. The end result looked like 10 rounds had been fired, all well within the 10 ring. The first three shots were in a hole the size of a quarter, then I pulled the 4th one off about 2 inches. The next 10 rounds essentially filled out the first holes. This is one accurate firearm!

Easy DIY Upgrades

Upgrades, enhancements, customization . . . you pick the word. There are some easy things you can do to make a gun truly yours, especially if it’s a 1911. I’m using 1911 examples for this article because the parts necessary for these upgrades are readily available and on a 1911, the upgrades are relatively easy to accomplish. Why would you want to do any of these upgrades? That’s up to you. Maybe this isn’t for you, but I’ve always liked adding my own personal touch to items I own. As a kid I was into Hot Rods and Custom cars and I guess I’m still a kid at heart at 67, so here we go.

First let’s talk about grips. That’s an easy upgrade and sometimes it’s the difference between having a gun you can comfortably shoot and one you can’t. Or maybe you just want to change the look of the gun to make it more appealing. I’ve done several things with grips on my 1911s, but one of the most rewarding has been adding aftermarket logo grips. Here are some photos of grips I’ve added to a Remington R1, and a Ruger LW Commander:

Commander Grip Panels

The Remington Grips are Walnut with the metallic Remington “R” logo added. The Ruger grips feature the Ruger Phoenix logo carved into the beautiful wood grips. I have to admit that as beautiful as the Remington Grips are, I first tried them on my R1 Carry Commander and swapped back out to the full-size Ruger because those particular grips are a little rough on my hands when I shoot. So I’m going for beauty on the one I don’t shoot as much. The Ruger grips are totally satisfying in both look and feel and set the gun apart from a stock SR1911 LW Commander.

ColtGripsAndScrews
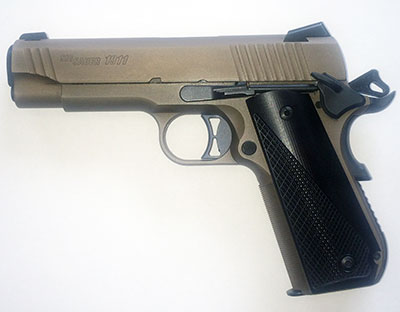
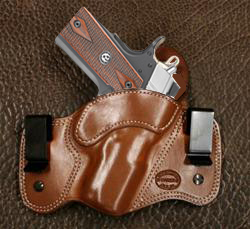
I really had fun with the Colt because not only did I find Colt logo grips that look and feel nice, but I even found some logo grip screws to hold them on. What’s really cool about these grips is where I found them–on Amazon.com. There are hundreds of grip choices on Amazon.com. Something to remember about swapping grips out is that if you go for thin grips–and I like thin grips because I have short, stubby fingers–you’ll need screws and bushings designed for thin grips. The bushings are what screws into the frame. The grips fit down over the bushings, then the grip screws screw into the bushings to hold the grips on. If they are not sized right, the grips can be loose or the screws can go too deep through the bushings and contact the magazine making it difficult or impossible to insert or drop. Strike Industries makes grip screws and bushings in both sizes and with in stainless, blued, or nickel and these are all available on the Amazon.com website as well as directly from Strike or through other firearms accessory suppliers.

In addition to the logo grips you can find grips of varying styles, colors and textures when shopping at Amazon or any number of other websites–those of the grip makers plus Midway USA or Brownell’s. One of my favorite companies makes VZ-Grips. Google for them and you’ll find quite a variety.

The next two upgrades I’m going to tell you about involve a little more work and gun disassembly than just changing out the grips. The first is installing an ambidextrous safety. I bought my ambi  safeties from Wilson Combat, but they’re not the only makers. It’s just that I’ve learned to appreciate the quality that goes into Wilson products, plus their outstanding customer service. Wilson make two grades of safety, the regular grade and another they call “bullet proof”. I’ve used the regular ones, but I think if I do it again, I’ll order the Bullet Proof design. That’s not because I’m unhappy with the ones I’ve got. I just want to try something different next time.

Ambi Safety
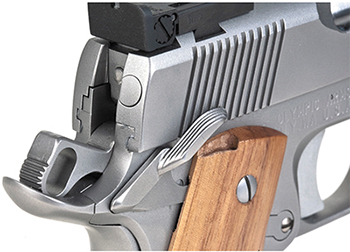
You may be surprised if you’ve never had reason to try this, but removing the existing safety from a 1911 is very simple. First unload the gun, then cock it. Then move the safety to a position that is halfway between on and off. You may have to get a small screwdriver blade or a the blade of a pocket knife to start it, but in that position, the safety will pop right out of the slide.

Installing the ambi-safety could be a simple as popping it in where the other one came out and pushing the right-hand side of the safety onto the post of the left-hand safety where it goes through the slide, but it’s more likely that you will have to do some filing. There are instructions and videos on Wilson’s website and on a number of 1911 forums. You’ll have to do a little disassembly so you can see how the safety is fitting, but it’s not complicated and the instructions will show you step by step how to do it. File a little, then check the fit. File a little more if necessary, but be careful not to over do it and you’ll find it’s really a fairly simple process. I’ve done it three or four times and the results have been gratifying every time. I don’t need an ambidextrous safety because I’m left-handed, but I like having one because it allows me to easily check the position of the safety in my holster regardless of what I’m wearing or body position.

Wilson Combat TriggerAnother easy upgrade for a 1911 is replacing the trigger. I bought a Sig Sauer 1911 that had a straight aluminum trigger with no holes. For me there were two things wrong with that trigger. The first was that it extended the reach for getting my finger properly placed on the trigger and my short fingers just didn’t like it. The second issue was that the trigger’s appearance just didn’t seem to fit the gun. I found a Sig Sauer 1911 ScorpionWilson Combat trigger that fit the bill perfectly and with it I replaced the original trigger. The Wilson trigger is black, curved and has the three holes. I don’t know if you can really tell from the picture of the gun here, but in my opinion, this is the type of trigger that should have come with the gun.

How much trouble was it to install? Again, it requires some disassembly and it might require a little sizing. In fact this one did. The trigger itself was too tall for the space provided in the gun. It’s made out of plastic and with a few touches with a file, checking the fit as I want along, I was able to make the trigger fit perfectly. Installing this trigger as a drop-in like I did had no affect on the weight of the trigger pull. But it did make for a slightly smoother trigger pull because the part of the trigger that slides in the frame was narrower than the stock trigger and produced less friction. Not a lot, but enough that trigger operation felt smoother to me after I did the upgrade.

Colt MagazinesI’ll cover one more upgrade and this is an easy one. Ever since I started shooting 1911s I have bought Wilson Combat magazines to replace the ones that came with the gun. This may have been superstition or it may have been because I’ve seen Wilson magazines solve other people’s ammo feeding problems on the range during our classes on numerous occasions. But after buying a Colt with 8-round flush-mount magazines, I have switched to using the Colt magazines in all of my 1911s and with great success. This gives me 9 rounds available before reloading and nothing extending from the frame grip. That’s more aesthetically pleasing to me and it helps with concealing the handgun.

Another thing I like about the Colt Magazines is the follower inside the magazine is metal, rather than plastic as in so many other brands. It’s angled just perfectly for feeding the rounds and I’ve never experienced any of the next-to-last-round failure to feeds that is common with other magazine brands. As I’ve written previously, I’ve vetted these magazines in all my guns and have absolute confidence in them.

So there you have it, some ideas about how you can easily tweak your gun to fit your own personality or needs. Parts are readily available, as is “how to” information on YouTube.com and other websites. Have fun and if you think about it, let me know how some of your projects have gone.


Ruger SR1911 CMD-LW – Making a Good Thing a Little Bit Better

If you’ve read my earlier blog articles you may remember that I came to my current appreciation of 1911 style pistols late in life. The gun that did it for me was a Ruger SR1911 Commander. A Commander-size 1911 is one with a full-size grip but with the barrel and slide shorted by 3/4 inch. This was done to make the gun a little easier to carry, especially if it is being carried as a concealed handgun. The Ruger Commander was not my first 1911. It was my fourth. The ones prior to it were a Taurus PT1911, a Colt 1991 and a Springfield Loaded Target Model. All of these were good guns, but for me they weren’t “carry” guns and I saw no reason to make them so. I was content carrying either a Springfield XDm or Smith & Wesson M&P, both in .45 ACP.

But, I got a Ruger 1911 Commander and loved everything about it. I loved the way it looked, the way it felt and the way it shot. It was (is) 100% reliable and it’s accurate and easy for me to shoot. With the right holster and belt combination it’s easy to carry.

The Ruger was followed by some others that are similar – a Colt XSE, a Remington R1 Carry Commander, a Sig 1911 Scorpion Carry Commander and a Smith & Wesson 1911 SCE Commander. The Smith & Wesson had become my favorite for several reasons, among them the bob-tail grip and the scandium/aluminum frame that made it at least 10 ounces lighter than the other Commanders. Now Ruger has come out with a lightweight model that matches the S&Ws weight.

Ruger Lightweight CommanderHere’s what it looks like. Beautiful, huh? It shoots like a dream. Last Saturday I shot a CHL qualify course (50 rounds at 9, 21 and 45 feet) plus 9 more, all using the Colt 8-round, flush-mount magazines I told you about in my last post. The close up rounds were all in one ragged hole and even as the target was moved out to the 45-foot line I was keeping all the rounds within the 9 and 10 ring. This was all free-hand with me standing.  After shooting, I cleaned and lubed it and put it in my carry holster and that is where it has been every day since.  My old pattern of rotating the carry gun every day or two has been suspended, at least for the time being. I really like having this new Ruger by my side.

D M Bullard Dual CarryNot really related, but in approximately the same timeframe I changed my carry rig. The holster that has historically really worked well for me was a CrossBreed SuperTuck used with a Crossbreed gun belt. Every time I tried something different, I found myself coming back to the Crossbreed. But the instructors what work with us at Texas Gun Pros had been telling me about D. M. Bullard, a local leather goods manufacturer and the quality of holsters, magazine holders and gun belts made by this company. We made arrangements to carry these in our store and to make the special order ones available for our clients, so I figured I’d better try them. I got a Dual Carry holster for 1911s, designed so you can wear it inside or outside the waistband. Mine is set up for inside or IWB as we call it in the industry, and I’m using one of D. M. Bullard’s belts and an outside the waistband single mag carrier. That’s the holster shown to the right here. The belt is beautiful, thick leather and the magazine holder solved a problem I’d been having with my IWB mag carrier wearing a hole in my jeans from the inside. So I’ve become a user and promoter of D. M. Bullard’s leather goods, which you can find in our store or which we can special order for you if you have an unusual gun.

Step-By-Step Guide to Concealed Carry

If you are paying attention to events here in the U.S. and around the world and are growing uneasy with the potential for harm to come to you and your family, join the club. Maybe, like me, you are or are becoming serious about concealed carry. From the perspective of someone who has carried 7 days a week, close to 16 hours a day for over 7 years now AND who has trained over 7,000 others in the Texas Concealed Handgun License Course, I can tell you how to do it.

First, get the training. The Concealed Handgun License Course is the minimum. If you can take advantage of other courses, I would start with the NRA’s Personal Protection Inside the Home and Personal Protection Outside the Home Courses. You can find times and dates for these courses here in the North Texas area at http://www.trainersgroup.net.

Start reading. As a minimum you should read The Gun Digest Book of Concealed Carry by Massaad Ayoob. In fact, read anything and everything by Massad Ayoob you can get your hands on.  As far as periodicals go, American Handgunner and Combat Handguns for starters. I actually read pretty much anything on Walmart’s magazine rack that relates to firearms. I also suggest you join the NRA and get their monthly magazine American Rifleman.

You need a good carry gun, at least one. I’m NOT talking about a little pocket gun. I’m talking about a gun that can get you out of a scrap, one that can stop a fight. I can vouch for the following:  Sig Sauer SP2022, Sig Sauer P226, Sig Sauer 1911 Carry, Beretta PX-4 Storm, Taurus 24/7, Stoeger Cougar, S&W M&P, S&W 1911 Commander, Springfield XDm, Springfield 1911, Remington R1 Carry, Ruger SR 1911 Commander. Some of these guns are 9mm, some are .40 S&W and some are .45.  For the past 3 years it has been rare that I’ve carried anything other than a .45.  My preference is for a Commander-Sized 1911. I have several that I have 100 percent confidence in because I’ve wrung them out at the range with various types of carry ammunition without a single failure.

You MUST have confidence in your gun with good Defensive Ammo. That means either Jacketed Hollow Point ammo or an expanding equivalent like Hornady Critical Defense or Federal Guard Dog. DO NOT carry FMJ (ball ammo) in your defensive handgun. There is too much chance of over penetration which could harm an innocent bystander. For the most part I use Hornady Critical Defense, but I also have a lot of confidence in Speer Gold Dot, Remington Golden Saber and Sig Sauer Defensive Ammo.

CrossbreedPacketNotice all my guns are big. YOU can carry a big gun. Here’s how:

  1. Get a good gun belt
  2. Get a good IWB holster with multiple mounting points (Crossbreed SuperTuck, Alien Gear, White Hat Holsters).
  3. Buy some pants with either an expanding waistband or that are an inch or two larger in the waist than you usually buy.

I’ve written about holsters before, so go back and review some of my previous articles for details if you need to. For a good holster you will need to custom order one that fits your gun from one of these places. Although I like Crossbreed and continue to wear their holsters, Alien Gear makes a great holster for less money and I can’t tell the difference when wearing one of theirs.

I’ve had friends get by with less expensive holsters, even minimalist holsters, but they don’t really carry full-size guns or wear them all the time.

If you’re going to be serious about Concealed Carry, be serious about it. Don’t leave your gun at home or in the car. Carry it with you every where it’s legal to carry. I find that I very seldom have to go someplace where it’s not legal, so I’m pretty much armed all the time.

When you get your belt and holster rig, practice drawing from it – a bunch. I draw from my holster several times a day. I practice drawing so often that my gun is out and on target quickly and my sights fall right where I want them to.

Carry spare ammo. See the IWB mag carrier in the photo above. That’s Crossbreed’s offering. I always have at least one spare magazine on my support side.

If you are a Sheep Dog, you have got to be ready. You’ve got to be paying attention to what’s going on around you, always alert. You need to be skillful with your firearm and you need to keep it loaded and ready.

If you follow the steps I’ve outlined above and find that you can’t carry comfortably, come see me and I’ll buy your belt and holster from you.

Hurting Hands Remedies

In my last post I relayed how shooting one of my .45 ACP 1911 Commanders had been painful due to some arthritis issues with my hands. That was a disappointing, though not surprising, discovery for me and one that I hope and pray will help me to have more concern and compassion for students in our classes who find certain guns or calibers difficult to shoot.

Sig Sauer 1911 ScorpionI love those Commanders and in fact had recently added another to the collection, one that I was modifying and had not yet had a chance to shoot. That gun is a Sig Sauer 1911 Scorpion Commander. I didn’t like the straight trigger it came with so ordered a curved, skeleton trigger from Wilson and did my first trigger installation on a 1911. Once I got it back together I needed to shoot it both to check my trigger job and the overall reliability of the gun before adding it to my carry collection. I took the Sig to the range along with a .45 Caliber Smith and Wesson M&P and a 9mm M&P.

I started with the Sig and discovered I’d not done the job correctly –and the gun wouldn’t fire. Not at all. I should have figured that out at home by trying the pencil-down-the barrel test, but I didn’t. It was obvious the Sig had not been reassembled correctly. Somehow the Series 80 trigger safety disconnect wasn’t in the right position. So as not to waste the time at the range, I shot the .45 ACP M&P. It’s recoil has never affected me before, but this time, I found it a bit uncomfortable. And I didn’t shoot tight groups with the gun like I have been doing with the 1911s.

I tried the 9mm M&P. That was sixteen rounds of pure shooting pleasure, all grouped together in a tight little ragged hole in the center of the target. It was like shooting a .22. Okay, maybe I’m going to have to resign myself to carrying a 9mm until I figure this all out. I fired several magazines worth of Hornady Critical Defense and Winchester Silver Tip 9mm just for fun.

A week went by with me carrying the 9mm, while trying various grips on my carry Commanders to help lessen the hand pain next time I go shooting. I also went back through the YouTube Video on how to reassemble a Series 80 1911 and this time I managed to get everything on the Sig Scorpion back in the right place. The pencil I placed in the barrel went flying across the room when I pulled the trigger. It was time to go back to the range.

I only took two guns to shoot this time. One was the M&P .45 because if I can’t carry and shoot a 1911 well, this would be the gun I’d want to rely on. The other was the Sig Sauer 1911. I shot the Sig first. Then I shot it again. I loaded up and shot 9 rounds of Hornady Critical Defense using the 8-round magazine that came with the gun. The gun performed flawlessly and I didn’t do so bad myself. Next, I loaded up an 8-round Wilson Combat magazine and got the same results. Then a 7-round Wilson Combat magazine. Then I shot a bunch of Winchester 230 grain ball ammo and some Winchester JHPs and some Federal Guard Dog ammo, then some more Hornady Critical Defense. What can I say?  My hands didn’t hurt, the gun is accurate and reliable and promises to be one that will stand up to daily wear very well. So that’s what I’m carrying now.

I’m not sure what the future will bring regarding adjustments due to arthritis in the hand, but I know it’s a possibility and I’m prepared to do whatever I need to in order to have personal and family protection with me whenever I go out.

Update August 7, 2021:  I’m still shooting and carrying at least a 9mm. My favorite carry gun as of late is a Mossberg MC2C. It’s a double-stack nine that’s as thin as a M&P Shield. It carries 13+1 rounds, has a good set of 3-dot night sights and I have no trouble racking it. It is 100% reliable and is capable of consistently putting rounds at the point of aim up to at least 15 yards.

Fun Day at the Range – It Seems You Always Learn Something

At the Gun RangeYesterday we taught an NRA Basic Pistol class and upon completion of the class shooting exercise, my son Phillip and I decided to hang around and shoot some of our guns just for fun. We both had new guns that we had not yet shot and we had some other toys we just wanted to play with. I started my shooting session by shooting a couple of magazines of my chosen defensive carry ammo (Hornady Critical Defense) in the gun I’ve been carrying as my concealed carry gun for a while. When I started shooting the S&W .45 ACP Commander-Sized 1911, I realized it hurt my hands to shoot. I’ve heard people talk about certain guns or caliber of guns being painful to shoot, but this is the first time I experienced it for myself. I’ve got both arthritis and bursitis, but the arthritis is concentrated more in my knees while the bursitis is in my shoulders. My hands have some symptoms of arthritis, but in general they don’t prohibit me from doing much. But now I know what some of my clients are talking about. I believe it was primarily the texture of the grip, which on this gun has a fish scale pattern, that hurt, but it may also have been a function of recoil.

One of the guns I’d brought along to shoot was a new Sig-Sauer Texas Edition 1911. I might carry that gun sometime, so I wanted to know for sure it would work with Hornady Critical Defense ammo and the new Sig Sauer personal defense ammo, so I loaded up a couple of magazines and started shooting. The gun did fine and was accurate, but this gun, too, was painful to shoot. The grips on this gun also have a somewhat aggressive texture.

Next I pulled out a Remington 1911 R1 Carry with a suppressor. Things got quiet all around me as shooters in the other lanes wondered what that sound was that sounded more like a carpenter’s hammer than live .45 ACP rounds. That gun didn’t hurt to shoot and surprised me with how easy it was to aim with the suppressor on it and how the suppressor didn’t affect it’s accuracy. There was oil in the can, so there was a lot of smoke.

M&P 22 With SupressorThat was so much fun I pulled out the S&W M&P .22 with suppressor and put 10 little holes in a small circle with little more than a “pssst, pssst” for sound (well, that’s what you hear when you have on ear protection). In the lane next to me, Phillip was banging away with his PMR-30. Both of us were attracting the attention of shooters in adjoining lanes, me because of my silencers and Phillip because that gun holds 30 rounds of LOUD .22 magnum and it seems to like you can keep shooting forever.

We invited nearby shooters to shoot our toys and they quickly took us up on it. To me, part of the joy of being able to own some cool guns, is being able to share them with others. We had invited some friends and family members to come shoot with us, but the scheduling didn’t work out. So we got to put smiles on the faces of some newfound friends.

We shot some other guns and after shooting a while, I felt I needed to breathe something besides gun smoke, so packed up as much as I could and moved out to the lobby. Phillip stayed behind and talked with some of the other shooters, eventually passing out business cards. For both of us it was an enjoyable day. I know Phillip saw his shooting improve as he worked on the fundamentals we teach in every class, and I came away thinking I might need to re-evaluate my approach to carrying a gun.

Though I have grown to love the 1911 Commanders, I’m thinking the M&P 45 or maybe even the M&P 9mm may be a better choice for me on days when I’m experiencing a little more pain than usual or when I know it’s going to be a very long day. Rainy days especially affect my joints, so perhaps on rainy days, all of the 1911s stay in the safe and I venture forth with an M&P instead. It’s something I’m still pondering, but I know that as I age there are other areas in which I’ve had to make adjustments in my lifestyle, so I promised myself not to be resistant to change when it seems the logical thing to do.