
Upgrades, enhancements, customization . . . you pick the word. There are some easy things you can do to make a gun truly yours, especially if it’s a 1911. I’m using 1911 examples for this article because the parts necessary for these upgrades are readily available and on a 1911, the upgrades are relatively easy to accomplish. Why would you want to do any of these upgrades? That’s up to you. Maybe this isn’t for you, but I’ve always liked adding my own personal touch to items I own. As a kid I was into Hot Rods and Custom cars and I guess I’m still a kid at heart at 67, so here we go.
First let’s talk about grips. That’s an easy upgrade and sometimes it’s the difference between having a gun you can comfortably shoot and one you can’t. Or maybe you just want to change the look of the gun to make it more appealing. I’ve done several things with grips on my 1911s, but one of the most rewarding has been adding aftermarket logo grips. Here are some photos of grips I’ve added to a Remington R1, and a Ruger LW Commander:

The Remington Grips are Walnut with the metallic Remington “R” logo added. The Ruger grips feature the Ruger Phoenix logo carved into the beautiful wood grips. I have to admit that as beautiful as the Remington Grips are, I first tried them on my R1 Carry Commander and swapped back out to the full-size Ruger because those particular grips are a little rough on my hands when I shoot. So I’m going for beauty on the one I don’t shoot as much. The Ruger grips are totally satisfying in both look and feel and set the gun apart from a stock SR1911 LW Commander.
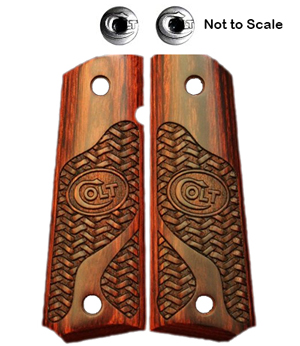 I really had fun with the Colt because not only did I find Colt logo grips that look and feel nice, but I even found some logo grip screws to hold them on. What’s really cool about these grips is where I found them–on Amazon.com. There are hundreds of grip choices on Amazon.com. Something to remember about swapping grips out is that if you go for thin grips–and I like thin grips because I have short, stubby fingers–you’ll need screws and bushings designed for thin grips. The bushings are what screws into the frame. The grips fit down over the bushings, then the grip screws screw into the bushings to hold the grips on. If they are not sized right, the grips can be loose or the screws can go too deep through the bushings and contact the magazine making it difficult or impossible to insert or drop. Strike Industries makes grip screws and bushings in both sizes and with in stainless, blued, or nickel and these are all available on the Amazon.com website as well as directly from Strike or through other firearms accessory suppliers.
In addition to the logo grips you can find grips of varying styles, colors and textures when shopping at Amazon or any number of other websites–those of the grip makers plus Midway USA or Brownell’s. One of my favorite companies makes VZ-Grips. Google for them and you’ll find quite a variety.
The next two upgrades I’m going to tell you about involve a little more work and gun disassembly than just changing out the grips. The first is installing an ambidextrous safety. I bought my ambi safeties from Wilson Combat, but they’re not the only makers. It’s just that I’ve learned to appreciate the quality that goes into Wilson products, plus their outstanding customer service. Wilson make two grades of safety, the regular grade and another they call “bullet proof”. I’ve used the regular ones, but I think if I do it again, I’ll order the Bullet Proof design. That’s not because I’m unhappy with the ones I’ve got. I just want to try something different next time.
 You may be surprised if you’ve never had reason to try this, but removing the existing safety from a 1911 is very simple. First unload the gun, then cock it. Then move the safety to a position that is halfway between on and off. You may have to get a small screwdriver blade or a the blade of a pocket knife to start it, but in that position, the safety will pop right out of the slide.
Installing the ambi-safety could be a simple as popping it in where the other one came out and pushing the right-hand side of the safety onto the post of the left-hand safety where it goes through the slide, but it’s more likely that you will have to do some filing. There are instructions and videos on Wilson’s website and on a number of 1911 forums. You’ll have to do a little disassembly so you can see how the safety is fitting, but it’s not complicated and the instructions will show you step by step how to do it. File a little, then check the fit. File a little more if necessary, but be careful not to over do it and you’ll find it’s really a fairly simple process. I’ve done it three or four times and the results have been gratifying every time. I don’t need an ambidextrous safety because I’m left-handed, but I like having one because it allows me to easily check the position of the safety in my holster regardless of what I’m wearing or body position.
 Another easy upgrade for a 1911 is replacing the trigger. I bought a Sig Sauer 1911 that had a straight aluminum trigger with no holes. For me there were two things wrong with that trigger. The first was that it extended the reach for getting my finger properly placed on the trigger and my short fingers just didn’t like it. The second issue was that the trigger’s appearance just didn’t seem to fit the gun. I found a
  Wilson Combat trigger that fit the bill perfectly and with it I replaced the original trigger. The Wilson trigger is black, curved and has the three holes. I don’t know if you can really tell from the picture of the gun here, but in my opinion, this is the type of trigger that should have come with the gun.
How much trouble was it to install? Again, it requires some disassembly and it might require a little sizing. In fact this one did. The trigger itself was too tall for the space provided in the gun. It’s made out of plastic and with a few touches with a file, checking the fit as I want along, I was able to make the trigger fit perfectly. Installing this trigger as a drop-in like I did had no affect on the weight of the trigger pull. But it did make for a slightly smoother trigger pull because the part of the trigger that slides in the frame was narrower than the stock trigger and produced less friction. Not a lot, but enough that trigger operation felt smoother to me after I did the upgrade.
 I’ll cover one more upgrade and this is an easy one. Ever since I started shooting 1911s I have bought Wilson Combat magazines to replace the ones that came with the gun. This may have been superstition or it may have been because I’ve seen Wilson magazines solve other people’s ammo feeding problems on the range during our classes on numerous occasions. But after buying a Colt with 8-round flush-mount magazines, I have switched to using the Colt magazines in all of my 1911s and with great success. This gives me 9 rounds available before reloading and nothing extending from the frame grip. That’s more aesthetically pleasing to me and it helps with concealing the handgun.
Another thing I like about the Colt Magazines is the follower inside the magazine is metal, rather than plastic as in so many other brands. It’s angled just perfectly for feeding the rounds and I’ve never experienced any of the next-to-last-round failure to feeds that is common with other magazine brands. As I’ve written previously, I’ve vetted these magazines in all my guns and have absolute confidence in them.
So there you have it, some ideas about how you can easily tweak your gun to fit your own personality or needs. Parts are readily available, as is “how to” information on YouTube.com and other websites. Have fun and if you think about it, let me know how some of your projects have gone.

