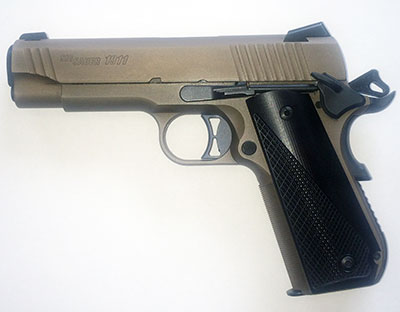
Some of my buddies have owned Rock Island 1911s and I’ve seen some pretty impressive targets as a result of their shooting range adventures. Recently I saw one of the Rock Ultra series Commanders at an “I don’t see how they can do that!” price. If you’ve read any of my stuff previously, you know Commander-size 1911 pistols are among my favorites. My “I don’t need any more guns” resolve seems to be short-lived, so naturally I gave in. The gun is classified as a Rock Ultra MS and it came with the features I like such as a skeletonized hammer and trigger and ambi-safety. It has what appears to be a very durable Parkerized finish. The sights are not my favorite, I like night sights, but the ones on this gun are visible and snag-free. The factory picture shows it with a fiber optic sight on the front, but mine doesn’t have that. The sights are black all over.
I changed the grips when I got it home. The gun came with a set of very aggressive G-10 grips. I had some not-so aggressive ones on hand, so I did a switcheroo with the grips, wiped off the shipping oil and put the gun and a box of 45 hollow points in the Jeep so I could try it out during the next trip to the range. That trip turned out to be a CHL class and since we had several instructors on hand, I set up on one of the lanes with a B-27 target, the Rock Island Commander and a box of 45s, planning to shoot part, if not all of the Texas CHL Shooting Proficiency test.

Target After the 1st 10 Rounds
After ten rounds I was disappointed. This is not how I shoot. I was confident that every time I squeezed the trigger my front sight was on the X and was properly aligned with the back sight, but my shots were going wide. You’ve seen my 1911 Commander targets. I generally obliterate the center of the target, especially at close range. The distance here was only 9-feet!
I shot another ten rounds and then we moved the targets out to 21 feet. By the time I’d fired 30 rounds total, I figured I was done. I pulled the target back in, and left some ammo so the other two instructors could try their hands at the gun. When the target got close to me I was surprised. The last 15 rounds or so, even at 21 feet were right in the center of the target, where they should be. That was more like it! When the other two instructors shot the gun, their shots were grouping well, but they both said their shots were impacting a little below their point of aim.
As we were discussing our thoughts about the gun later, one of them mentioned he had read that Rock Islands tend to get better after a little break-in. Funny, I read in the manual where they recommended a 500 round break-in period before making any kind of warranty claim. I’ve never been much on these break-in period claims. Most of my guns have cycled and fired right out of the box just like I wanted them to. But in this case, this particular gun’s accuracy did improve after a few rounds had been put through it.
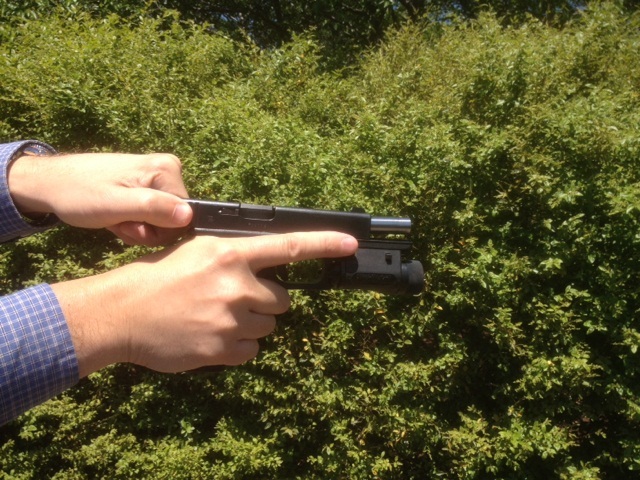
 There was another reason besides the price that I wanted to try this gun. It has a bull barrel as opposed to the barrel bushing arrangement on every other 1911 I’ve owned or shot. I’ve handled other 1911 style guns with bull barrels and noted they’re a little more challenging to take apart for cleaning, but had no information about whether one was better than the other. Comments I’ve read say that it adds a little more weight up front, which might help with recoil and it results in less parts to wear out. Another reason I’ve read is that in some of the early short-barrel 1911s the bushings had to be thinner and tended to break. I think that was a Colt issue with some of the earlier Commander or Officer firearms. Once the accuracy of this particular firearm improved to the point it became a non-issue I can’t tell the difference between shooting it and shooting a standard 1911 with the barrel bushing.
Workmanship on the Rock Island is superb. I find nothing to indicate its lower cost results in lower quality. From what I’ve read about Armscor, the maker of the Rock Island guns, they have state-of-the-art CNC machinery and they make the guns from the same 4140 steel as the best made guns from American manufacturers. I originally thought I might try this gun, write about it, then sell it, but for now I’ve decided to hold onto it. I’ll probably make it my “truck” gun, only now I drive a Jeep, so I guess it will be my “Jeep” gun.
Would I recommend it to others? If price is an issue and that stands between you getting a good 1911 45 versus some other gun, I would certainly suggest it with no reservations. Currently, I believe the Ruger Lightweight Commander 1911 is the best 1911 value on the market, with the Remington R1 Carry close behind. If you’re willing and able to spend more money there are a number of options. But this Rock Island is nothing you would be ashamed to own, carry, even show off!
Update 11/13/2020:
For more on my experience with Rock Island pistols, see my review of the Rock Island MAPP MS in the Mar/Apr 2019 issue of American Handgunner and a review of the Rock Island XTM-22 1911 in 22 Magnum in the December 2019 issue of GUNS Magazine.